"If you ride a bike, you will be fixing a bike." This is a quote from a Facebook friend, and it's one I didn't want to hear. But a year into my cycling life, I'm realizing he's right; and the sooner I learn good bike maintenance, the more confident I'll be on my rides.
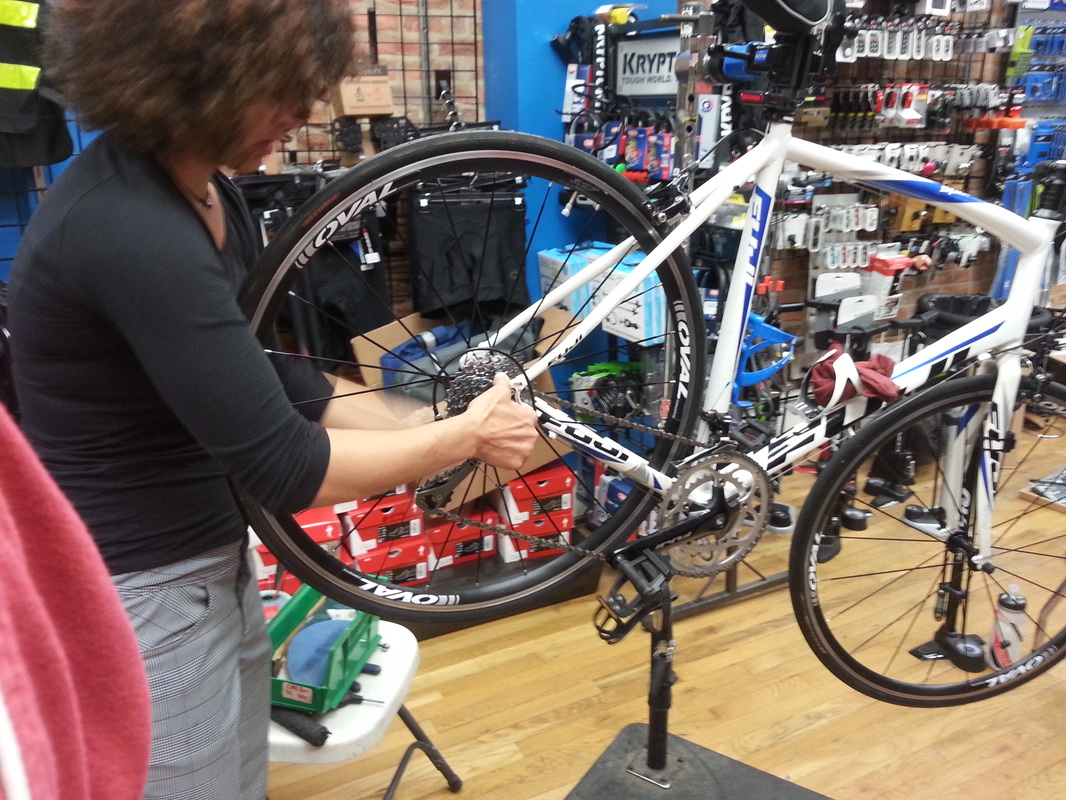
So it is that I find myself at Ride Brooklyn* which is hosting a clinic by Angela Azzolino on bike maintenance. Angela, a former bike builder, is now a mechanic. She is also the creator of Get Women Cycling, a program focusing on bike gear, maintenance etc. for women (more below **). But anyone can benefit from this clinic.
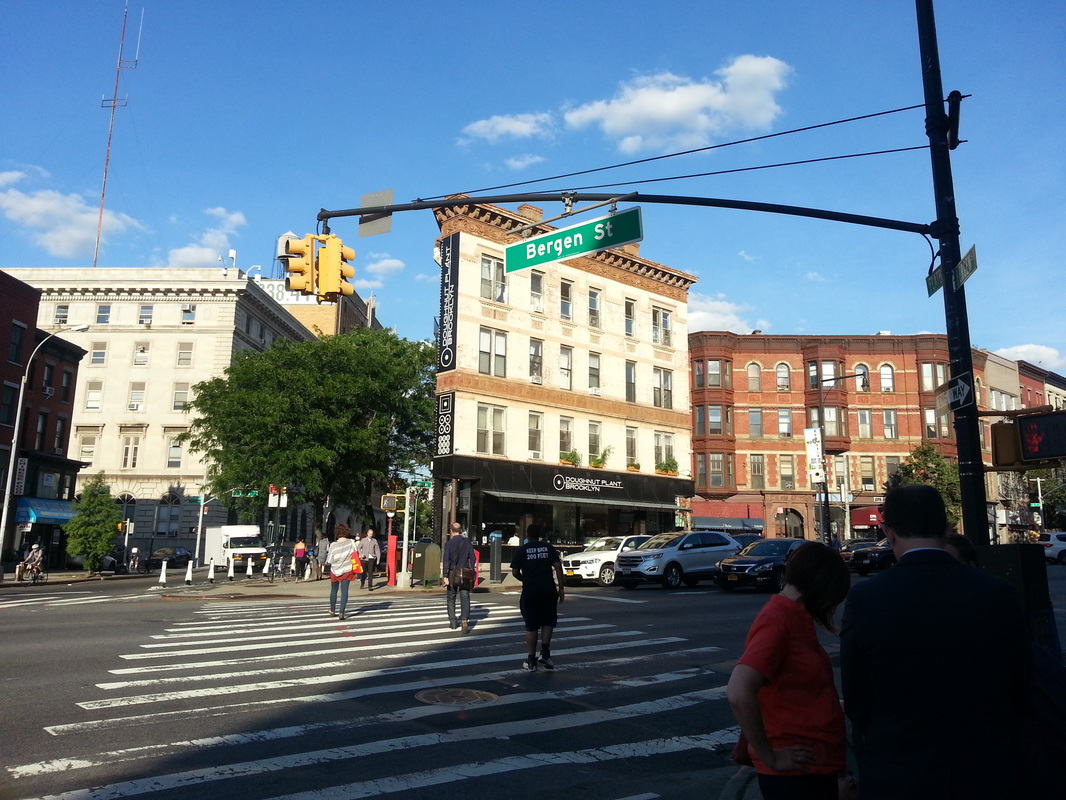
Ride Brooklyn is right off the Bergen Street subway stop (for those coming from Manhattan).
So it is that I find myself at Ride Brooklyn* which is hosting a clinic by Angela Azzolino on bike maintenance. Angela, a former bike builder, is now a mechanic. She is also the creator of Get Women Cycling, a program focusing on bike gear, maintenance etc. for women (more below **). But anyone can benefit from this clinic.
Ride Brooklyn is right off the Bergen Street subway stop (for those coming from Manhattan).
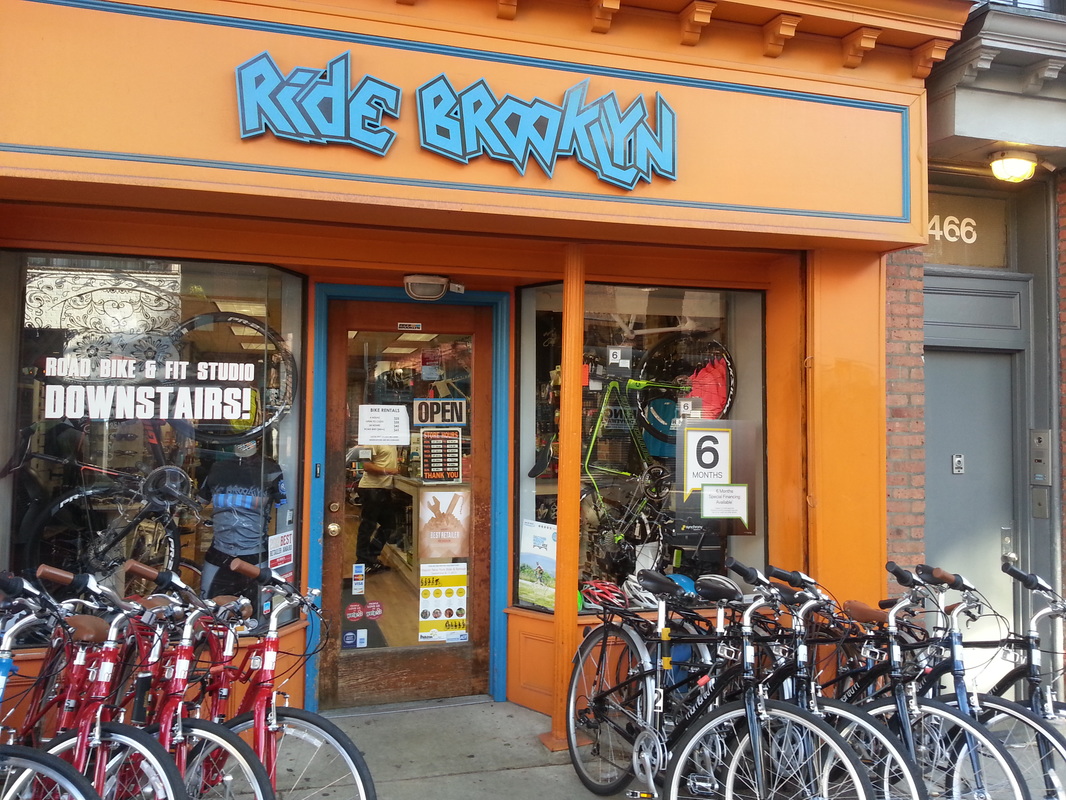
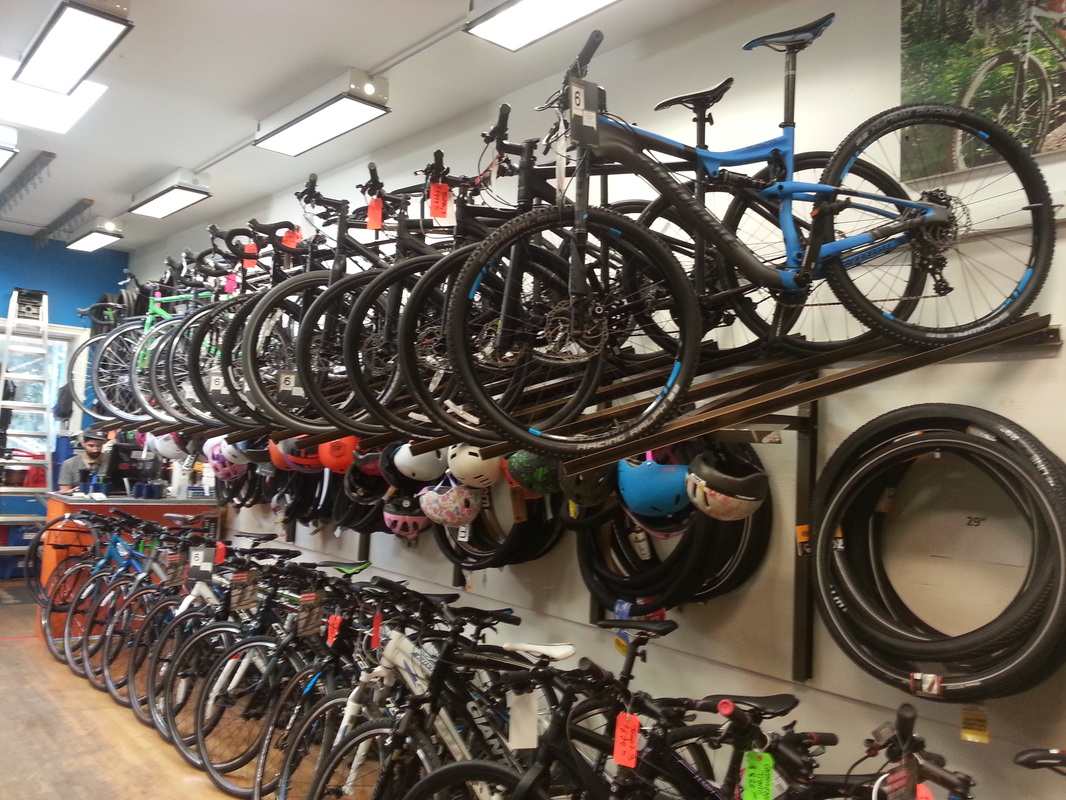
And has a generous inventory - I find the interior design instantly appealing.
As most people reading this will know, there are two kinds of valves: Presta (the skinny one) and Shrader (the wider one).
Angela tells us the most important thing she's learned as a mechanic is patience. I like her approach, because what she's saying is: adopt the right measures, but don't limit yourself if they don't work right away; noodle around until you get it right. It's an art as well as a science.
We start with the basics:
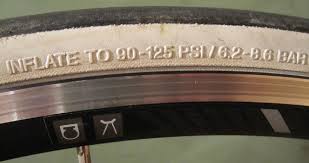
TIRES
First we look at tire pressure. The correct pressure can be found on the tire itself.
We start with the basics:
TIRES
First we look at tire pressure. The correct pressure can be found on the tire itself.
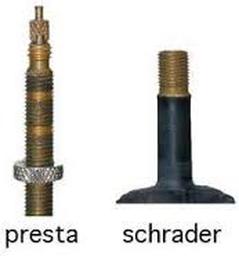
Later, I find there's a whole conversation about this*** but basically, Shraders are thought of as more versatile - they're the ones you can use at any gas station. There are adaptors which can make a Presta into a Shrader if you want.
When your tire is inflated to the correct Pound per Square Inch (PSI), feel it on the sides and get a sense of what that means, in the event you need to inflate and have no tire gauge. Generally under-inflating is safer (if you have to choose), though you need to watch out for pinch flats, where the tube becomes pinched between the tire and rim. Over-inflating can result in the tire leaving the frame, or even a blow out.
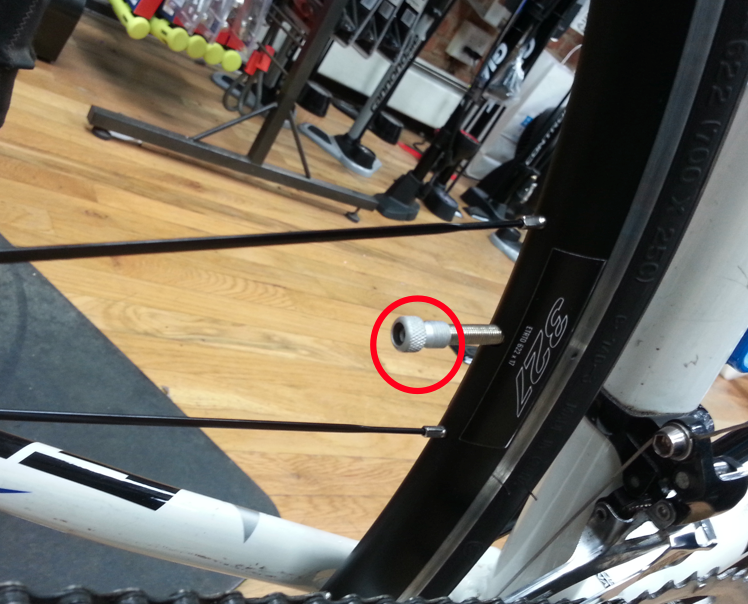
QUESTION: One day at Zen, two different people came in having snapped the top of their Presta valve off. I have also bent mine. How to avoid this?
ANSWER: Be sure the pump is down securely enough on the valve that there is no wiggle. And once again, patience in removing.
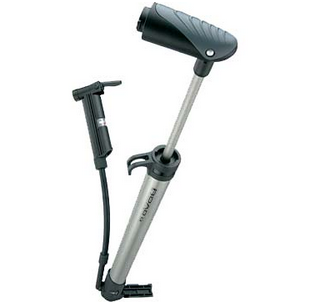
QUESTION: which is better, CO2 cartridges or bike pump for a flat?
ANSWER: Cartridges are more compact (there is no talk of the difficulties of using CO2 cartridges which I've read about), but generally a pump is more cost effective. Have a big one at home and a light, versatile one for the road. I have a portable pump with a tube which reaches to the tire and it has a small foot pedal, so you can pump standing and use some real torque. It also has a gauge. May I never have to use it.
QUESTION: One day at Zen, two different people came in having snapped the top of their Presta valve off. I have also bent mine. How to avoid this?
ANSWER: Be sure the pump is down securely enough on the valve that there is no wiggle. And once again, patience in removing.
QUESTION: which is better, CO2 cartridges or bike pump for a flat?
ANSWER: Cartridges are more compact (there is no talk of the difficulties of using CO2 cartridges which I've read about), but generally a pump is more cost effective. Have a big one at home and a light, versatile one for the road. I have a portable pump with a tube which reaches to the tire and it has a small foot pedal, so you can pump standing and use some real torque. It also has a gauge. May I never have to use it.
CHAINS
Lube them! Angela said she's had people come in using WD-40. We all cringe. Tri-Flow is the best all around.
Lube them! Angela said she's had people come in using WD-40. We all cringe. Tri-Flow is the best all around.
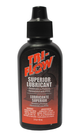
Unless you live in Portland or Seattle, in which case you should use a wet lube. Or if in Arizona, a dry lube. Angela uses a small bottle with an extended nozzle. You can use a spray if you need a little power.
The lube goes onto the chain rollers (the middle of the chain), not the plates (sides). Many chains have a master link (see below) if you can find it.
The lube goes onto the chain rollers (the middle of the chain), not the plates (sides). Many chains have a master link (see below) if you can find it.
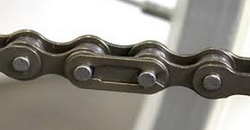
This is a good way to keep track of where you are when you started lubing. You can also lube the chain while it's on the cassette if you want. And don't forget to wipe off the excess.
QUESTION: When to lube? Twice a month or so - and definitely if you've been riding in rain. Check the chain periodically, once or twice a month. When the chain is very dry, you will know it because it will start to creak and make sounds while you pedal. The goal is to not let it get to that point.
PEDALS
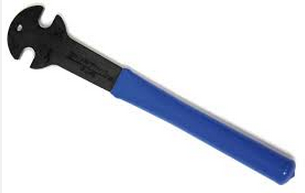
Make sure your pedals are on tight. All of the parts on a bike take punishment, especially on NYC streets, and they can loosen. Most pedals tighten with a pedal wrench (mine use an allen wrench).
QUESTION: When to lube? Twice a month or so - and definitely if you've been riding in rain. Check the chain periodically, once or twice a month. When the chain is very dry, you will know it because it will start to creak and make sounds while you pedal. The goal is to not let it get to that point.
PEDALS
Make sure your pedals are on tight. All of the parts on a bike take punishment, especially on NYC streets, and they can loosen. Most pedals tighten with a pedal wrench (mine use an allen wrench).
THE CRANK
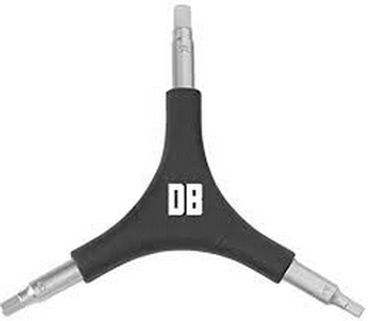
Check the pedal crank with an 8mm arm tool. The leverage of a longer handled tool will allow for greater torque and is recommended for those who do not have a lot of hand strength (ladies?). To tighten it, make sure chain is on large chain ring and push the wrench and the pedal towards each other.
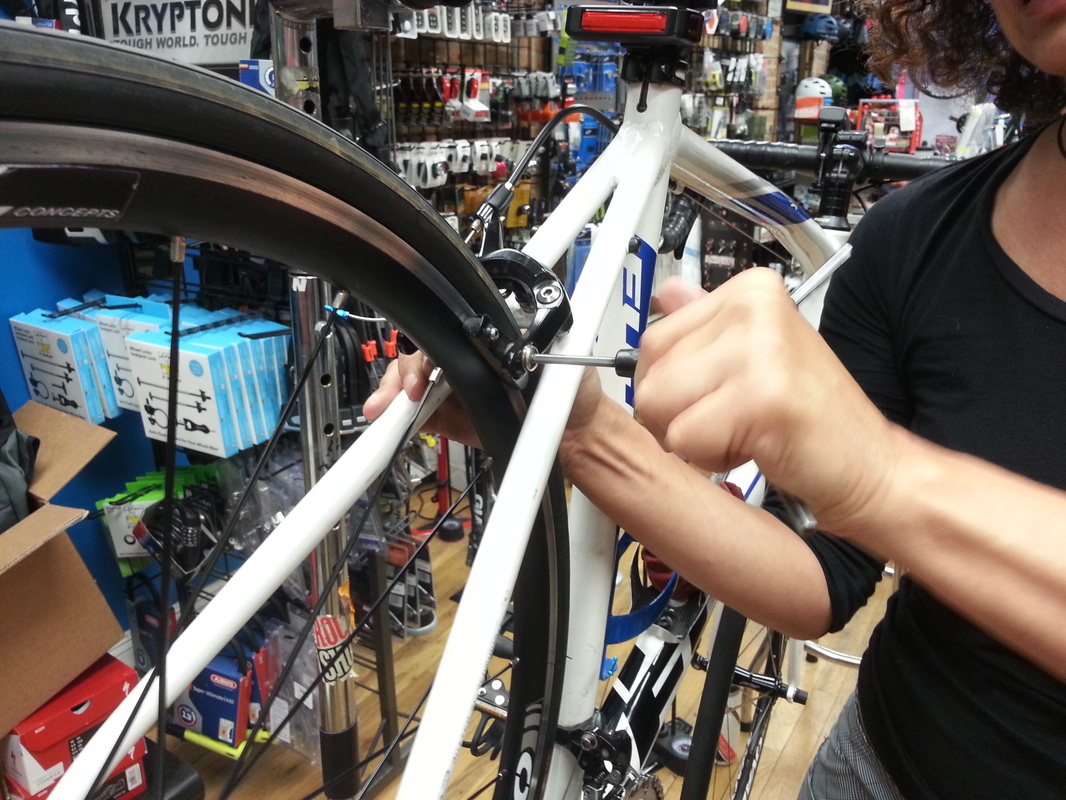
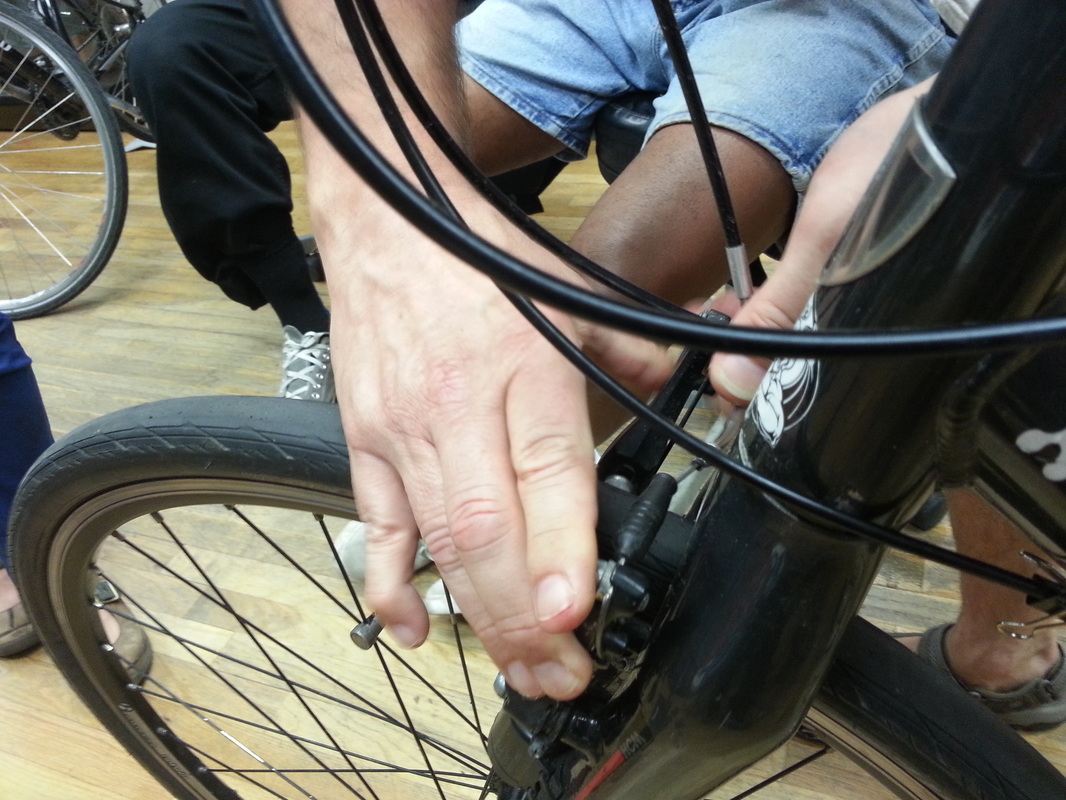
BRAKES
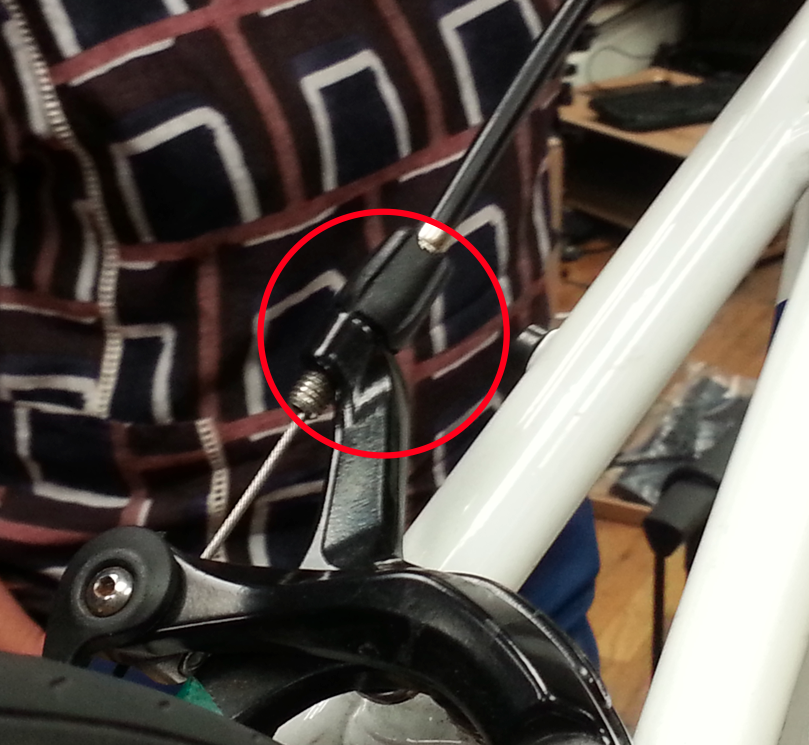
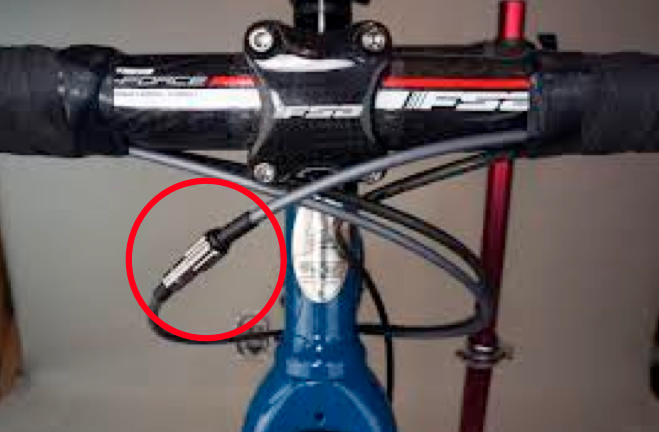
If your brake pads don't have enough grab, it may be as simple as cleaning your rims for schmutz or grease. I do this after almost every ride. A dry rag is fine. If your brakes stick, you can use Tri-Flow at the brake joints above the calipers (not on the brake!). If your brakes aren't braking fast enough, you can adjust barrel adjuster to tighten or loosen the cable.
Check the pedal crank with an 8mm arm tool. The leverage of a longer handled tool will allow for greater torque and is recommended for those who do not have a lot of hand strength (ladies?). To tighten it, make sure chain is on large chain ring and push the wrench and the pedal towards each other.
BRAKES
If your brake pads don't have enough grab, it may be as simple as cleaning your rims for schmutz or grease. I do this after almost every ride. A dry rag is fine. If your brakes stick, you can use Tri-Flow at the brake joints above the calipers (not on the brake!). If your brakes aren't braking fast enough, you can adjust barrel adjuster to tighten or loosen the cable.
To remove: Reverse Rear (turn towards the back). To tighten, tighten to front.
Or use a tri-tool.
This goes for both front and rear brakes. Front brake barrel adjusters are near the handlebars.
On the nut of the caliper. Make sure that nut is tight.
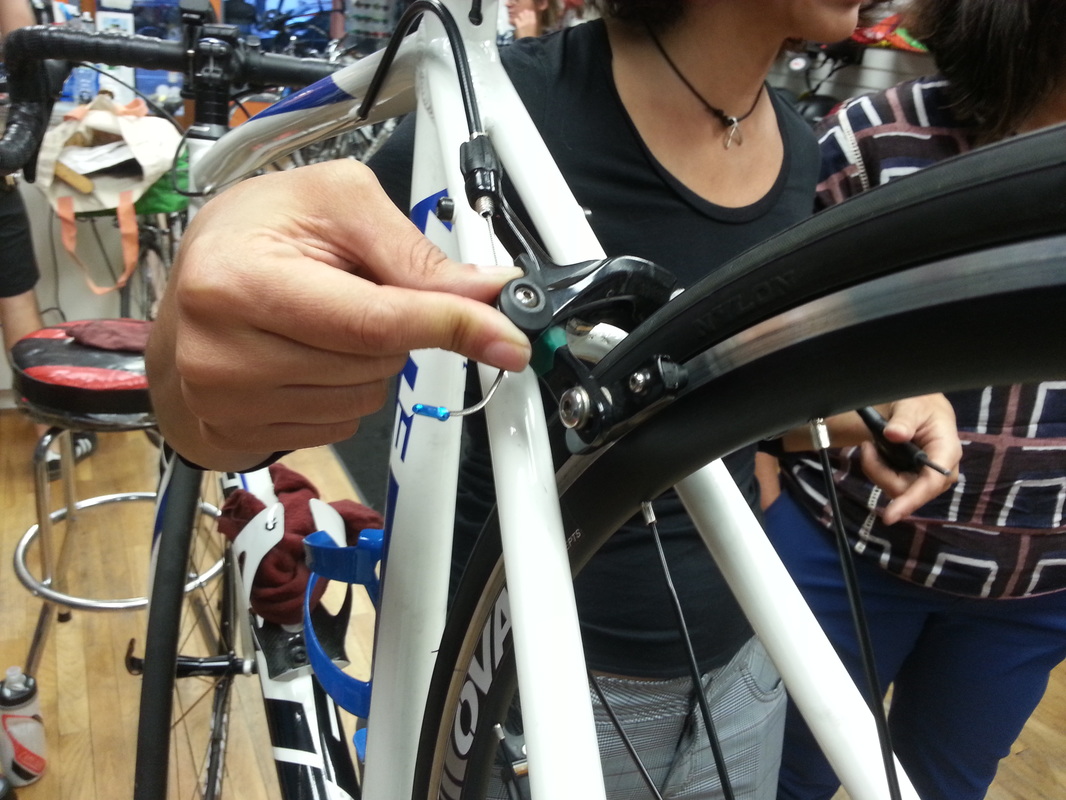
QUESTION: What if your brakes are squeaking?
ANSWER: If cleaning the rims doesn't do it, try pivoting/toe-ing your brakes. Loosen the allen nut. Place a small piece of paper at either the back or front of the brake pad to help toe them in...
ANSWER: If cleaning the rims doesn't do it, try pivoting/toe-ing your brakes. Loosen the allen nut. Place a small piece of paper at either the back or front of the brake pad to help toe them in...
Then carefully tighten (patience once again).
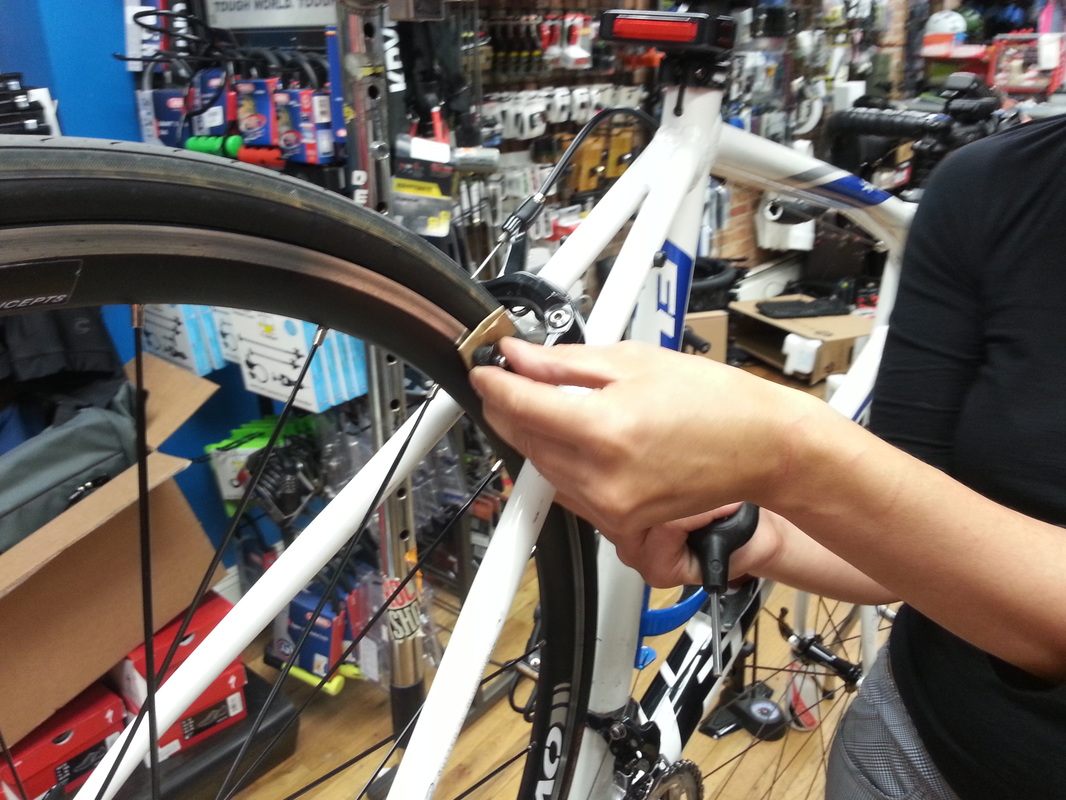
Brakes also wear out. Initially, brake pads will come with teeth. Their wearing down is an indicator you may need to replace them. You may want to remove the wheel first.
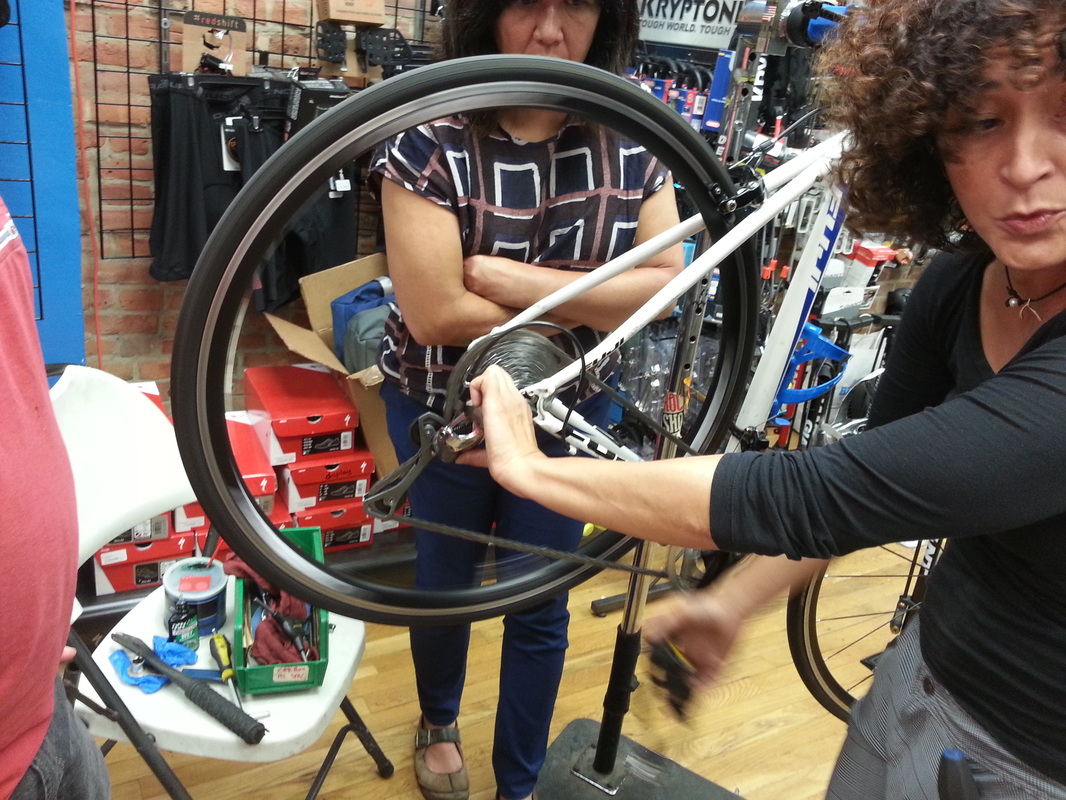
REMOVING THE WHEEL
Hey wait a minute, how did we get to this so fast? Do we really have to do this? But I was recently on a ride where we did have to do it. And since most flats occur on the rear wheel...A tri-tool will have all the sizes you need to remove a wheel. Make sure the chain is on the smallest cog in the back. First open up the brake's quick releases.
Brakes also wear out. Initially, brake pads will come with teeth. Their wearing down is an indicator you may need to replace them. You may want to remove the wheel first.
REMOVING THE WHEEL
Hey wait a minute, how did we get to this so fast? Do we really have to do this? But I was recently on a ride where we did have to do it. And since most flats occur on the rear wheel...A tri-tool will have all the sizes you need to remove a wheel. Make sure the chain is on the smallest cog in the back. First open up the brake's quick releases.
On some bikes it will look like this one below (in which case I've found you might want to deflate the tire somewhat to make it easier. I know...)
Then open up the wheel's quick release lever.
And remove the wheel (hahaha, is that all?) making sure the chain stays on the lower chain ring.
Oh no, what happened to my bike?! It was just a squeaky brake! Yes, you can just take it to a tech and let them do it. But now you know how to remove a wheel - and soon you will learn how to put it back again. Which would you rather have on a deserted highway? Hoping for a kind stranger (there are a lot of creeps out there), or getting up and running fast on your own? Now let's get back to those brakes.
Most brakes have an allen nut where you can loosen them, and the brake will slide right off.
Most brakes have an allen nut where you can loosen them, and the brake will slide right off.

Your brakes may still be good but gunky. If so, you can use a file...
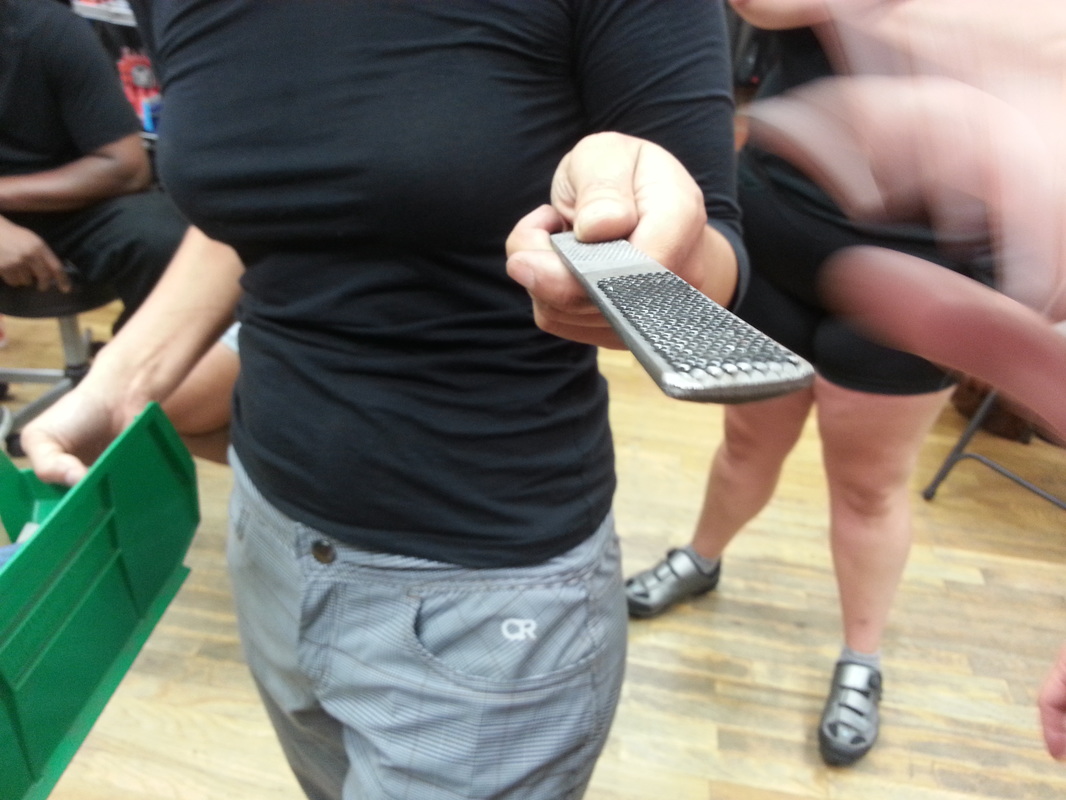
To remove the dreck. Or you can just get new brake pads, which will cost about $10.
And now for replacing the wheel (it's not as bad as it looks):
Slide it into place, making sure the chain stays on the smallest cog in the back.
And now for replacing the wheel (it's not as bad as it looks):
Slide it into place, making sure the chain stays on the smallest cog in the back.
Tighten the wheel quick release.
NOTE: Turn the quick release lever so that when it is closed, it is parallel with either the seat or chain stay to prevent it from catching on something and opening up unexpectedly.
Rotate the pedals and shift gears as you go.
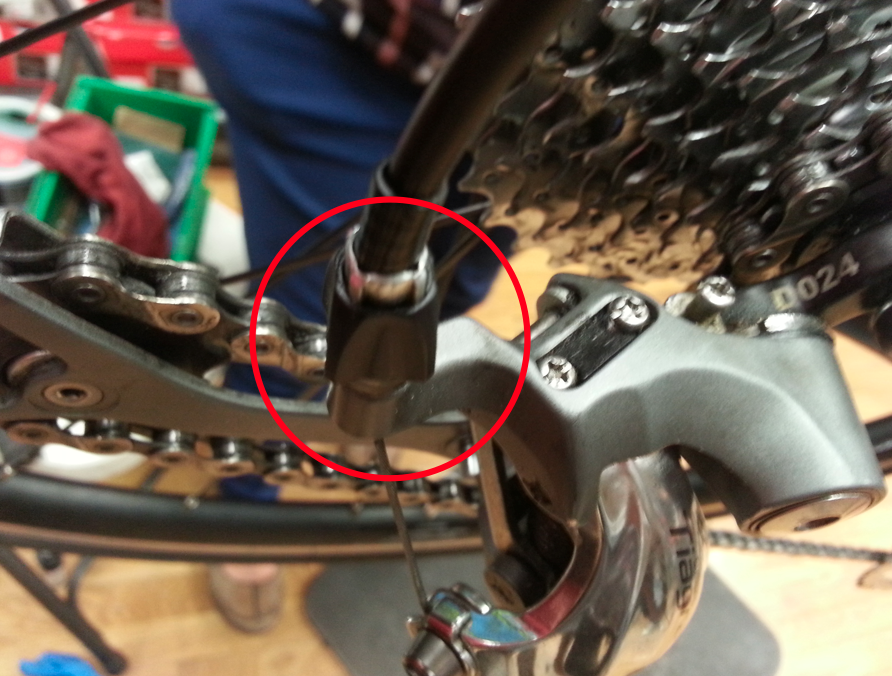
ADJUSTING THE GEARS
To adjust the highest and lowest gears, you'll need a phillips head screw driver. You'll find two limit screws which will adjust the chain either closer to, or farther from the frame. You will be glad to be able to identify these, because they are easy to adjust - and the result is really important.
NOTE: Turn the quick release lever so that when it is closed, it is parallel with either the seat or chain stay to prevent it from catching on something and opening up unexpectedly.
Rotate the pedals and shift gears as you go.
ADJUSTING THE GEARS
To adjust the highest and lowest gears, you'll need a phillips head screw driver. You'll find two limit screws which will adjust the chain either closer to, or farther from the frame. You will be glad to be able to identify these, because they are easy to adjust - and the result is really important.
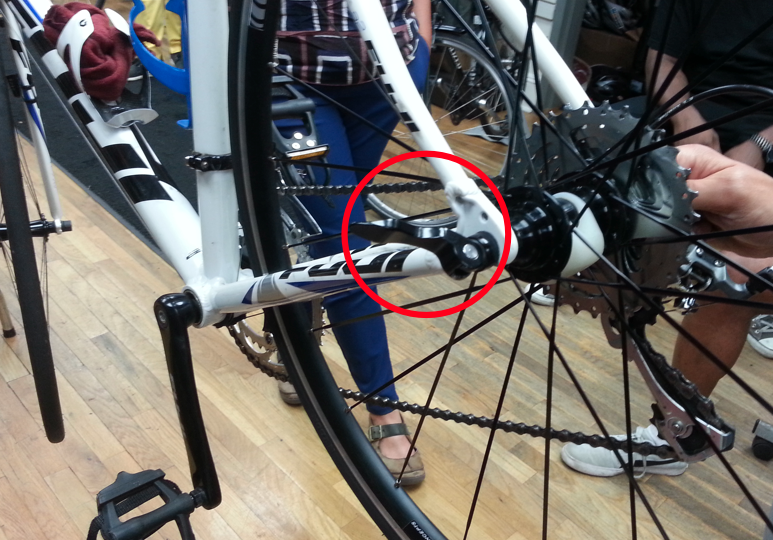
There could be skipping if it's not aligned just right. Stand behind the rear wheel and make sure the chain is aligned.

Sometimes they are labeled H (high/hard gear) and L (low/lazy gear), but in either case with patience, you will see which does which. Begin on smaller chain ring and highest gear, and shift the derailleur. If the tension is wrong, the chain will rub against the spokes. You'll want the chain position to look like this one above - right in the center of the derailleur. The front derailleur limit screws will be the same. Bring to the front of the cassette and shift - don't touch the derailleur. If the front derailleur is badly adjusted the chain will fall off - or won't even drop to a small gear. Shift the gears as you go and see how the chain switches from one to another.
For the mid-level gears - the ones we use the most - there is another barrel adjuster (I'm beginning to love barrel adjusters).
For the mid-level gears - the ones we use the most - there is another barrel adjuster (I'm beginning to love barrel adjusters).
Rotate the pedals, while moving the derailleur so it is straight.
FINALLY, since this was all about the brakes to begin with, don't forget to close the brake quick release.
There is nothing like hands-on experience and Get Women Cycling has lots of clinics all over the five boroughs listed in their newsletter (address below).
Thanks to Ride Brooklyn for hosting this great event!
*RIDE BROOKLYN: http://ridebrooklynny.com
** GET WOMEN CYCLING: http://www.getwomencycling.com
*** PRESTA VS SHRADER: http://bicycles.stackexchange.com/questions/8157/why-are-both-schrader-and-presta-valves-still-used-on-tubes